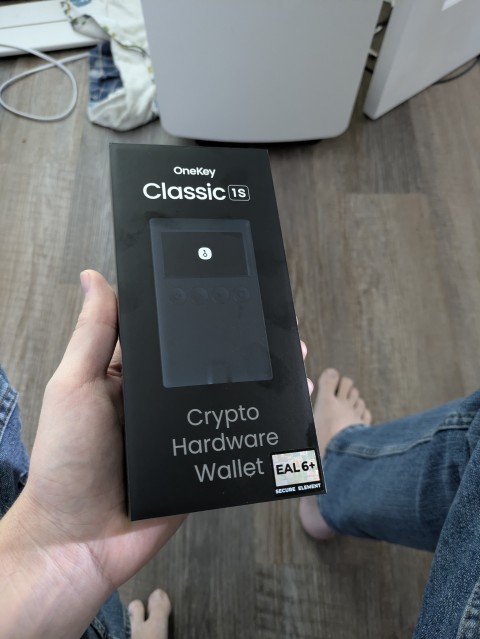
In this review I’ll be reviewing the new OneKey Classic 1S mostly on its own merits, along with two of the OneKey apps that make it work.
I’ll occasionally compare against other hardware wallets that I have, including the fairly new Keystone and the much older Trezor Model T. Not all comparisons are fair because the products are not all equally new. I’ll be happy to review newer competing devices if their manufacturers care to send me new devices.
Disclaimer: I am not a security researcher, and my review will not cover whether the hardware or the software is secure as advertised.
TLDR
- Really impressive packaging, but has a usability quirk.
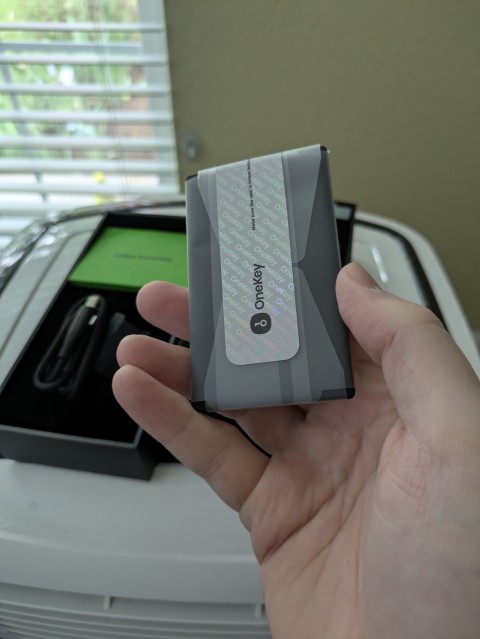
- The smallest and lightest hardware wallet I’ve tried, and feels sturdy.
- Not the coldest wallet. To use it, you must connect it via USB to your computer for a firmware update. Other hardware wallets I’ve tried are never connected to a computer, preferring SSD cards for firmware updates.
- No Zcash blockchain support (transparent or shielded). Get a Keystone hardware wallet for Zcash.
- OneKey Classic 1S is more convenient than Trezor Model T due to its battery and Bluetooth connectivity but it has a few rough spots in the user experience that software updates should be able to correct in the future.
- OneKey Classic 1S is the least expensive among those I looked at that promises strong hardware protections. It’s also the newest kid on the block and would benefit from some software updates. It has even less expensive variants that I would definitely consider.
- Would I use it? Yes.
Hardware wallets side-by-side comparison
| Trezor Model T | Keystone | OneKey Classic 1S | |
| Connectivity | USB | Air-gapped via camera and QR codes. | USB required to set up. Approve via USB or Bluetooth |
| Software bundled | Polished; includes swap/buy/sell features. | None; use with your favorite wallet via its Keystone integration feature. | Looks good, but rough around the edges; includes swap/buy/sell features. |
| Sharded seed phrase support? | not sure | Yes | No |
It’s worth calling out that a different OneKey product that I am not reviewing (OneKey Pro) offers true air-gapped QR code based signing.
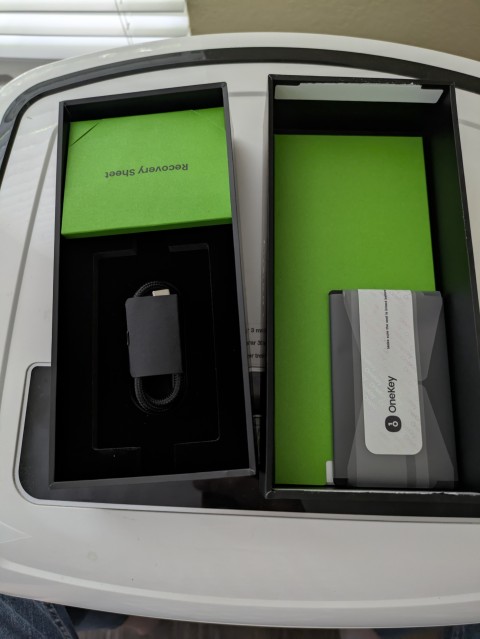
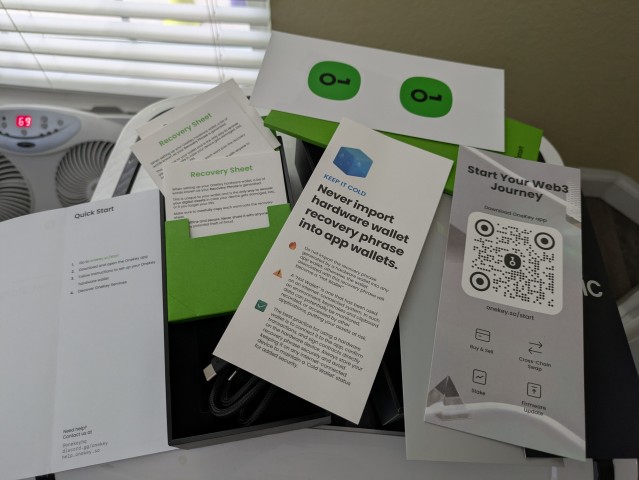
Unpacking
Hardware security features
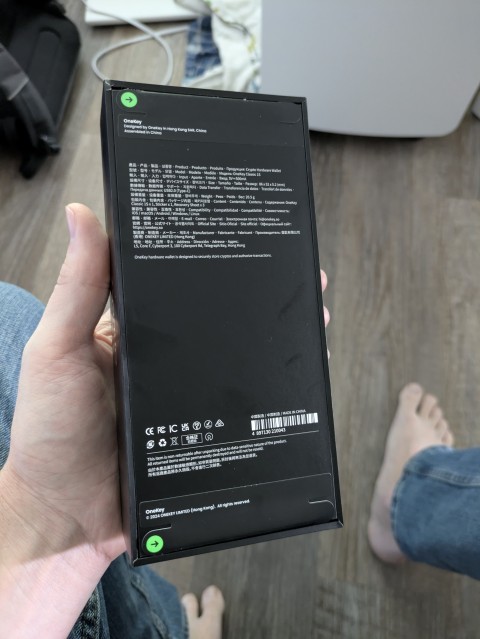
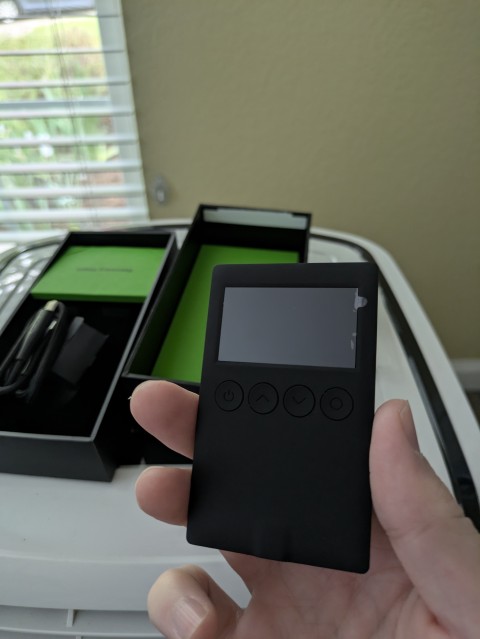
The box is sturdy and well-fit. And it took me a while to figure out how to open it. Yes, I was being a little coy, as I could clearly see the green arrows. But it really didn’t look like those were attached to the lid of the box. Answer: they are. Pull them to unseal the box. Nifty security feature. To be fair, all this is documented at Authenticate OneKey Classic | OneKey Help Center. I didn’t know that at the time.
No AC adapter. No hint as to whether I was supposed to plug the hardware wallet’s USB cable into a computer or an AC outlet.
First-time activation
One page of instructions, with essentially just a link to https://onekey.so/start to learn more. After navigating there and selecting which device I had, the up-beat instructional video started. 19 seconds into the 3 minute video, it switched devices on me and showed an evidently battery-powered device running. Is mine battery powered? It’s a lot thinner and less expensive than the device shown on the video, and I know some of these thinner OneKey devices are not battery powered. Tapping the power button on my device doesn’t activate the screen. Is the battery dead? Do I need to plug this in first? But no AC adapter, and some hardware wallets brag about how you never have to or should plug them into a PC in order to protect their ‘disconnected’ nature.
So I hopped on the OneKey web site to review that indeed my device does have a battery. It must have shipped without any charge. So I’ll plug it into the wall with one of my own AC adapters. The screen immediately came on upon plugging it in (no need to push the power button). The 4 buttons were intuitive, aided by the second screen to appear which made it clear how to operate them.
At this point I’m struck by how very lightweight this device is. Sturdy enough to keep in my pants pocket, I wonder?
There’s no indication on the setup screens what the battery level is while charging, so I’m torn between leaving it plugged in for longer, working with it while hunched over toward the floor where it’s charging, or just unplugging it and counting on the battery to be high enough now to last through the end of the setup experience.
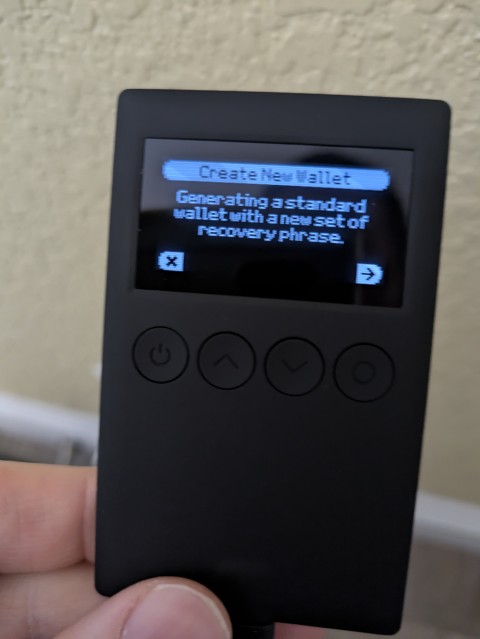

The seed phrase words are displayed in large font so they are easy to copy onto one of the 3 paper seed phrase booklets that were included in the box.
No option to create a sharded phrase. But I can choose between 12, 18, and 24 word seed phrases. Its process to copy the words down and verify that you got it right is straightforward and ends with me feeling 100% confident that I got it right. The device is protected by a user-selected 4-9 digit PIN. Each digit of the pin has to be selected like a rolling combination lock given there are only 3 hardware buttons usable for entering it in. But the really bizarre thing was that the Up key makes digits get smaller and the Down key makes digits get larger. That’s backwards! (update: their friendly customer service informed me that the device’s General Settings menu has an “Input Direction” command that allows you to switch this so that it’s intuitive. Why this isn’t the default is beyond me, however.)
After completing the PIN and seed phrase, the device was in a ‘normal’ mode and showed me I had a full battery. But it sure doesn’t act like it. It won’t power up when I press the power button (even for several seconds). It starts up immediately when I plug it in, but when I unplug it, it dies within a minute while I’m actively interacting with it. Maybe the battery is a dud. I’ll leave it plugged in a lot longer and see whether that improves. (spoiler: it works fine after I charge it for longer).
The rest of the video… I didn’t watch. It was using the wrong device, and aside from how to power it on (which the video didn’t show) the rest was pretty self-discoverable without an instructional video.
The Windows app setup process
I wouldn’t have expected app installation to take a whole section of the review, but it was something of an ordeal.
The site figured out I was on a Windows desktop machine and suggested their Windows app, with an .exe download or a Microsoft Store option. I chose the Store option. It took a surprisingly long time to install. Even the Store thought there might be a blockage and suggested I look around for a popup window that I might need to respond to. I didn’t see one.
After a few minutes I gave up waiting and closed the Microsoft Store window. I re-opened, tried to install again. This time after a few seconds of the same prompt as above, it transitioned to a “Something went wrong” error that wasn’t helpful.
Good thing there’s an .exe installer option. So I switched to that, and was surprised to find that the installer isn’t signed with a strong code sign certificate, as evidenced by the strong attempt my browser made to keep me from running the installer.
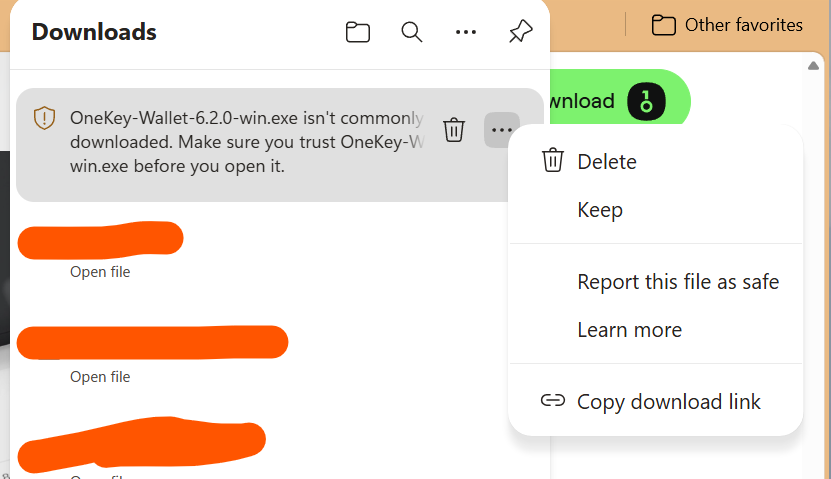
As secure as every other aspect of this device is in its design and packaging, I expect nothing less of the app that drives it.
To be clear, the installer is signed:
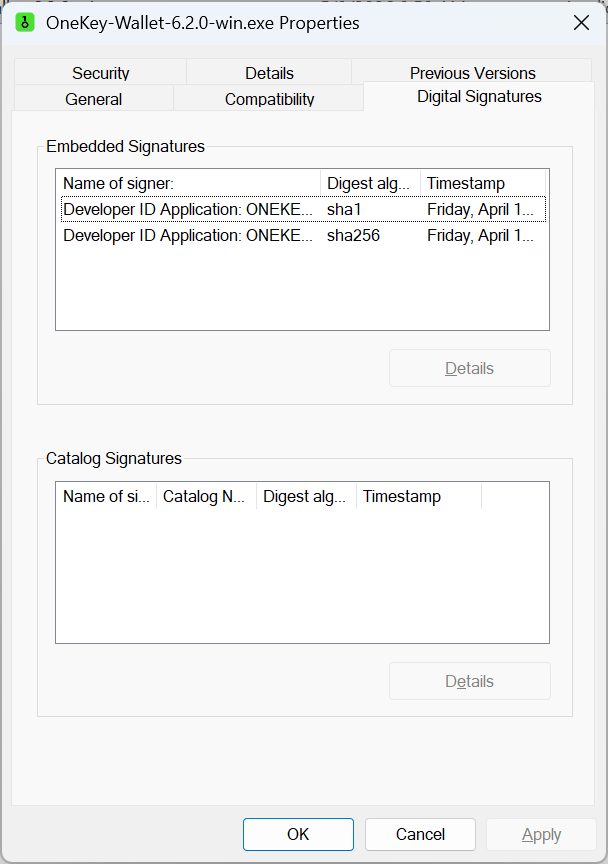
But my understanding is that browsers lay off their protective “don’t run this executable!” handling if the certificate used to sign the code is an EV code signing certificate.
Executing this .exe didn’t produce any UI. No installer and no app. I looked in the Windows start menu. No new app and searching for OneKey didn’t turn up anything. I opened Task Manager and found a OneKey installer process sitting there, but noticed it was the installer from the Microsoft Store. So I killed that process and then tried running my local installer .exe again. This time a window appeared immediately.
The installer had only one question for me: is this for just me or for everyone on my computer. I chose “just me” and delightfully, the installer didn’t insist I give it admin-level permissions.
And…. the installer hung.
It’s unclear what it’s hung up on, but I’m betting it’s the same thing that was hanging up the Microsoft Store installer.
At this point I decide it’s time to contact product support. While waiting for their answer, I realize my whole computer is acting funny so I sign out and sign in again, and now it installs fine. Go figure.
I have to leave the device plugged into the wall since the battery doesn’t last more than a minute. But it turns out its Bluetooth connectivity option allows my computer to ‘find’ it anyway. Nice.
The first step is a device firmware genuineness check. I start that, and moments later the OneKey app window disappears. No explanation. I presume it’s a crash, so I restart. Same thing happens again. The Windows Event Viewer doesn’t record any crash. After a 3rd attempt, I decide to update my email thread with customer support and wait for a response.
I try a 4th time. This time the window doesn’t vanish. But it hangs saying “connecting”. In the corner of my screen, Windows found a Bluetooth device and is trying to connect. I initially ignore it because it appears unrelated to the app and I don’t want to mess with the app’s attempts to connect via Bluetooth. I look at the device, and it’s offering a PIN to enter to pair bluetooth. But the app isn’t asking for a PIN. So I click the Windows toast, and a PIN prompt pops up from Windows. I enter the PIN, and Windows says pairing is complete. The app then transitions… not to a success screen but to a failure: “The checking process was interrupted.” and would I like to retry? Sure.
This time, the 5th attempt, works. The genuineness check requires coordination between device and computer where I enter my device PIN and approve the check, and it passes. This device PIN is entered using my computer, via a ‘blind’ keypad whose ‘key’ is on the device’s screen. This is much faster than entry via the 3 hardware buttons with the backwards arrows, and the computer can only detect count of reused digits and their positions in the sequence, disclosing very little about my PIN if my computer had malware that was sniffing the clicks.
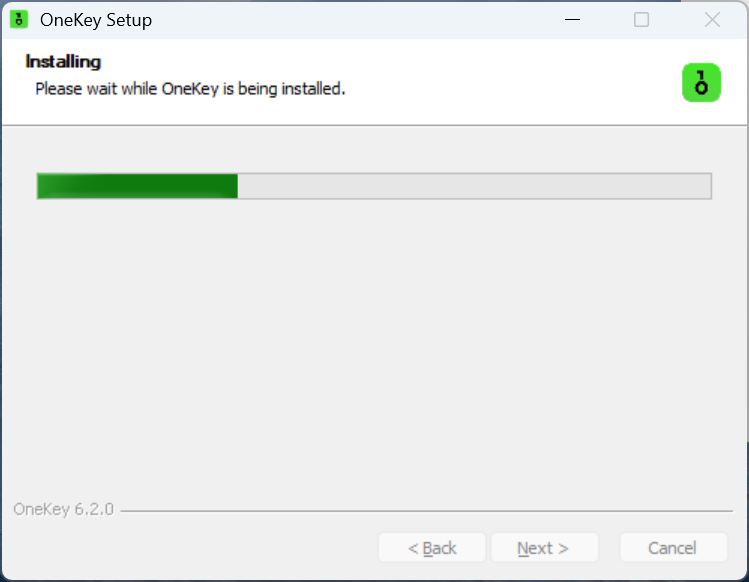
Next up is a Firmware check, and I’m told an update is available, and that requires a USB connection. I quickly attach my device from AC power to my computer hoping the battery lasts (it does). The app recognizes the device immediately and the firmware update proceeds. Updating required a few reboots of the device, each with another entry of its PIN on the Windows app. And the device asked me twice if I wanted to install firmware by OneKey. I would have thought I was stuck in a loop and should unplug the USB except the Windows app showed via a progress bar that progress was being made. So I guess the firmware update required two steps. Ultimately, the firmware update was successful.
Really bothersome quirk: you can’t always drag this window around. It seems they’ve custom drawn the whole window frame and forgot to leave a draggable titlebar. There are invisible regions where if you get lucky you can click and drag, but sometimes you can’t get to them.
Receiving crypto
This is why we get the hardware wallet, after all.
The receive screen in the app offers to help me buy crypto, receive it from an exchange, or just get my hardware wallet’s address so I can send it directly.
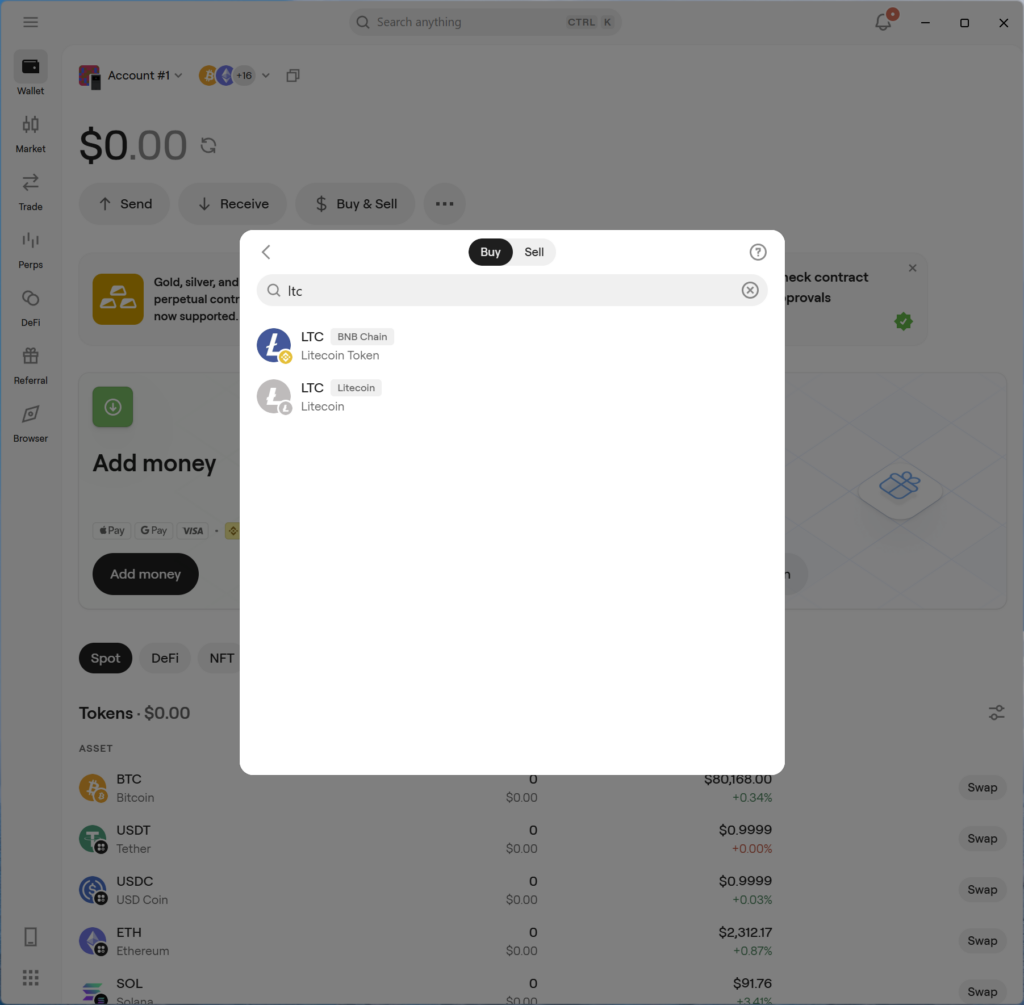
Now, my favorite crypto being Zcash, that was the first address I went looking to generate. Here, I’m disappointed. There are six ZEC-related tokens that the app is prepared to receive, but none of them are based on the Zcash blockchain. They are all various wrapped tokens. So no native Zcash blockchain support — not even for transparent addresses. For my cold wallet Zcash needs, I’ll have to stick with Keystone.
Let’s try Litecoin then. I went to Buy Litecoin within the app. It asked me which address type to create, after which it asked me to enter a PIN code. Bug: the “Enter PIN code” UI pops up below the “select address type” window, which is still visible even though I already selected it. So it’s impossible for me to enter the device PIN.
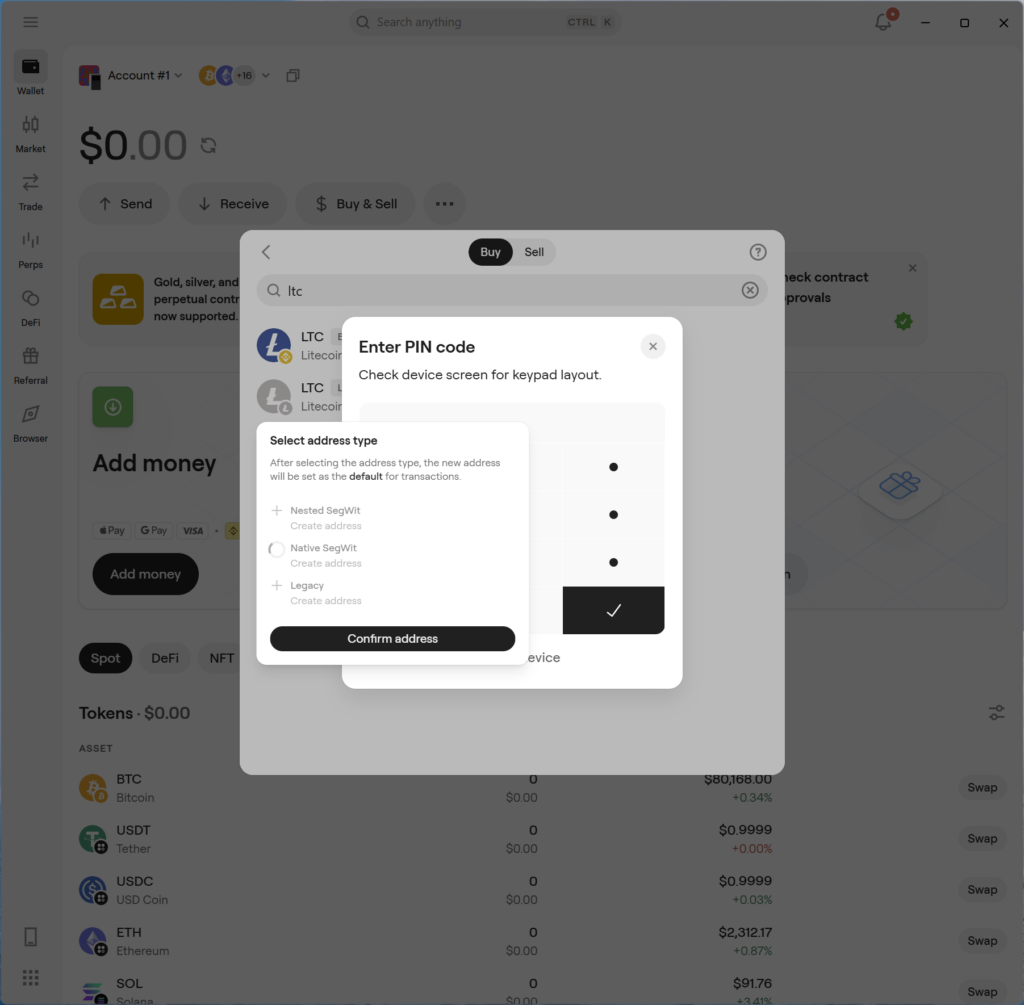
Or at least, it seems so. After trying to click around to drag these pop ups around (which doesn’t work) the address type picker disappeared, without explanation. I entered my PIN, and … I was left with the LTC buy screen (where I was to begin with).
Fortunately this wasn’t an infinite loop, because when I tried again to receive LTC, the address type I selected before was preselected and I could just “Confirm” it. The PIN wasn’t required this time.
The Buy feature of the app apparently is backed by a subset of many onramp providers. In my case 5 providers were queried, and the app chose the one with the best price, but I can override it if I wish. The app shows the effective price I’ll be paying. Coinbase wasn’t one of the providers and offered a slightly better price than the best offered by the in-app onramp providers. Coinbase: $59.09 USD/LTC vs. Topper: $59.45 USD/LTC. Not too bad for in-app convenience.
I’m paying with a debit card (the app’s recommended system) and KYC is very much applicable here in the U.S. I had to part with my email, full name, address, phone number. And of course my debit card number. No passport or driver license photo though. This is based on Topper being the selected onramp provider. I imagine it might vary by provider, and certainly by the country you’re in. Use of a debit card added more fees to the transaction, so generally I recommend acquiring your crypto a slower way (e.g. via Coinbase and EFT checking account transfer).
After completing the debit card purchase of a bit of LTC, I was taken to onramper.com within the app, for some reason. I switched back to the Wallet screen of the app to see…. $0.00 in my wallet. “Don’t panic.” it’s just that LTC wasn’t one of the coins that the app had filtered to scanning for value from. Why wouldn’t the app look for LTC in my wallet given I used the app to generate an LTC address and buy the LTC to fill it? Usability bug.
Sending crypto
The send screen has a QR code scanner that works with my Windows PC’s camera. It quickly recognized a QR code displayed from my cell phone screen.
I used the Bluetooth connection this time, so no futzing with cameras or cables to use my hardware wallet to sign the transaction. I had to unlock with my PIN (of course). The small display effectively showed me the recipient address, the amount and fees, so that if the PC were compromised I couldn’t be tricked into signing an unintended transaction.
After sending the crypto, the balance shown by the app didn’t immediately change, and I struggled to find where it showed a list of transactions of received or sent funds. After about 30 seconds, the balance did update to reflect my spend. By digging through the token types list and clicking LTC and switching tabs to Native SegWit, I was finally able to find my LTC transaction history. My spend transaction was there.
But in just moments after sending my transaction, it reports that I have 3103??? confirmations (exact number redacted). Clearly buggy. That looks like maybe the block that mined the transaction. But nope. The transaction wasn’t mined until 2 blocks after that reported number. In other words, it claimed millions of confirmations before the transaction had even been mined! I later went back to that page and the confirmation count had gone up by 1. So it appears that confirmation # is just showing me the current block height of the blockchain, irrelevant to either blocks since my transaction was mined (which is what it should have indicated) or the block # that was mined. Later, the app sent me a notification that the send has completed, and at that point the “confirmation count” field had changed to a field that was correctly labeled “block height” and it had gone up 1 more than before, showing the actual mined block. I don’t know what’s up with the confirmation count field then. Totally busted and misleading. And while “block height” is a useful thing to show, confirmation count is also useful since most people won’t know the blockchain tip # or want to subtract the ‘block height’ of the mined transaction from that to count confirmations.
Then I dismissed the send page that the notification had activated and navigated back to the send dialog manually. This time it shows both block height and confirmations. And both numbers appear correct.
But it appears that the LTC blockchain node the app uses on the backend is a few minutes behind oklink.com’s view of it.
On the good side though, my LTC did transmit correctly and was received by my phone app wallet.
The OneKey Android mobile app
The Android app installed quickly and paired via Bluetooth great — so long as I had unlocked the OneKey before trying to pair Bluetooth.
However, it wasn’t particularly intuitive after that. I had already sent and received some LTC and I expected the wallet app to reveal the balance I had left. I first had to tell the wallet to check for LTC, which I half-expected because I had to do the same thing on the Windows app. But whereas the Windows app asked which kind of LTC address I wanted, the Android app did not, and it created the wrong one, so it still showed a 0 LTC balance.
I manually hit “create address” under “Native SegWit”, which seems unintuitive because I already created an address and to a novice crypto user they’ll probably not understand why creating an address will produce the same address on two machines, or why creating an address is necessary to unlock funds that are already there in the first place.
But of course, after hitting Create address under the correct address type, the funds showed up. Great.
Customer support
I heard back from customer support multiple times in the course of about 12 hours. So I’m pleased to report they’re responsive.
In conclusion
The hardware is better (as far as I can physically tell) than the software at this point. But the software is pretty usable as-is so if the price and capabilities are a good fit for you, I’d recommend this device.
If you decide to buy a OneKey device, please consider using my affiliate link: OneKey Classic 1S